
From your first project to an app update
Create a project, add keys and translations, publish a preview, and download the credentials your app needs.
1. Create your account and project
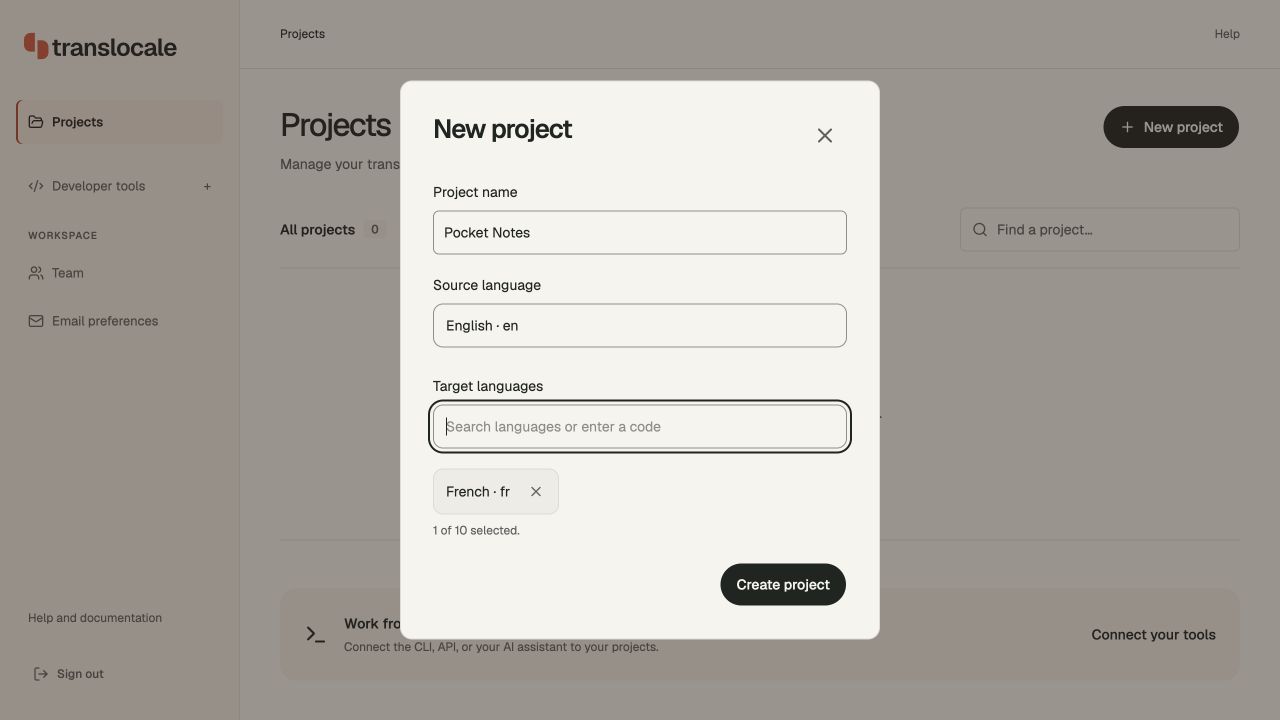
Sign in or create an account. Complete the setup questions or choose Skip to plans, then choose a plan. Free is available for trying the workflow. In Projects, choose New project. For this example, use Pocket Notes, English (en) as the source language, and French (fr) as the target. Choose Create project. You can work alone; inviting a team is optional.
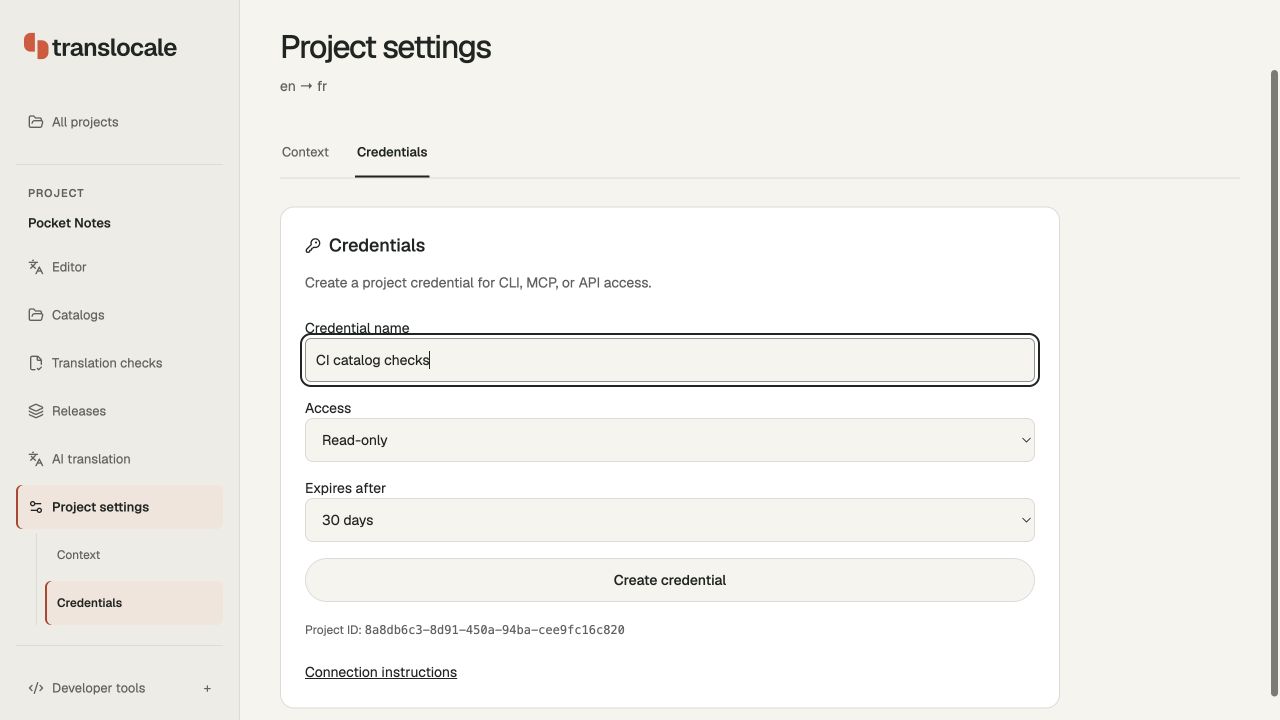
Your project ID appears under Project settings → Credentials. Copy that UUID when a CLI command asks for PROJECT_UUID. It identifies the project; it is not a password or an access token.
2. Add a catalog and your first key
A catalog is a named language file. A key is the stable name your code uses to look up wording. For example, common.json can contain a welcome key whose English text is Hello {{name}}. The name placeholder stays in both languages; the app supplies its value.
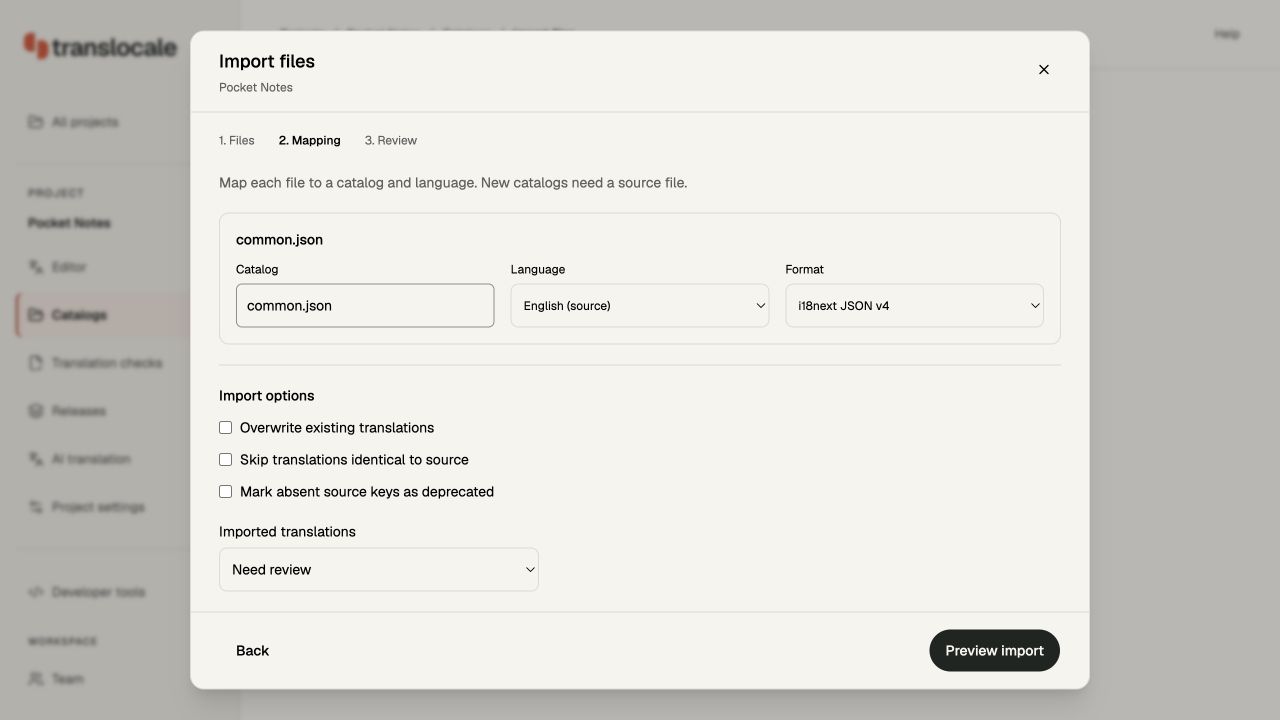
Open Catalogs → Import files. Import the English source below as common.json, choose i18next JSON v4, and select English. Preview the import, inspect the changes, then import them. Keep the same catalog name for the French file and select French as its language. Do not create separate catalog identities called en.json and fr.json.
{
  "welcome": "Hello {{name}}"
}{
"welcome": "Bonjour {{name}}"
}
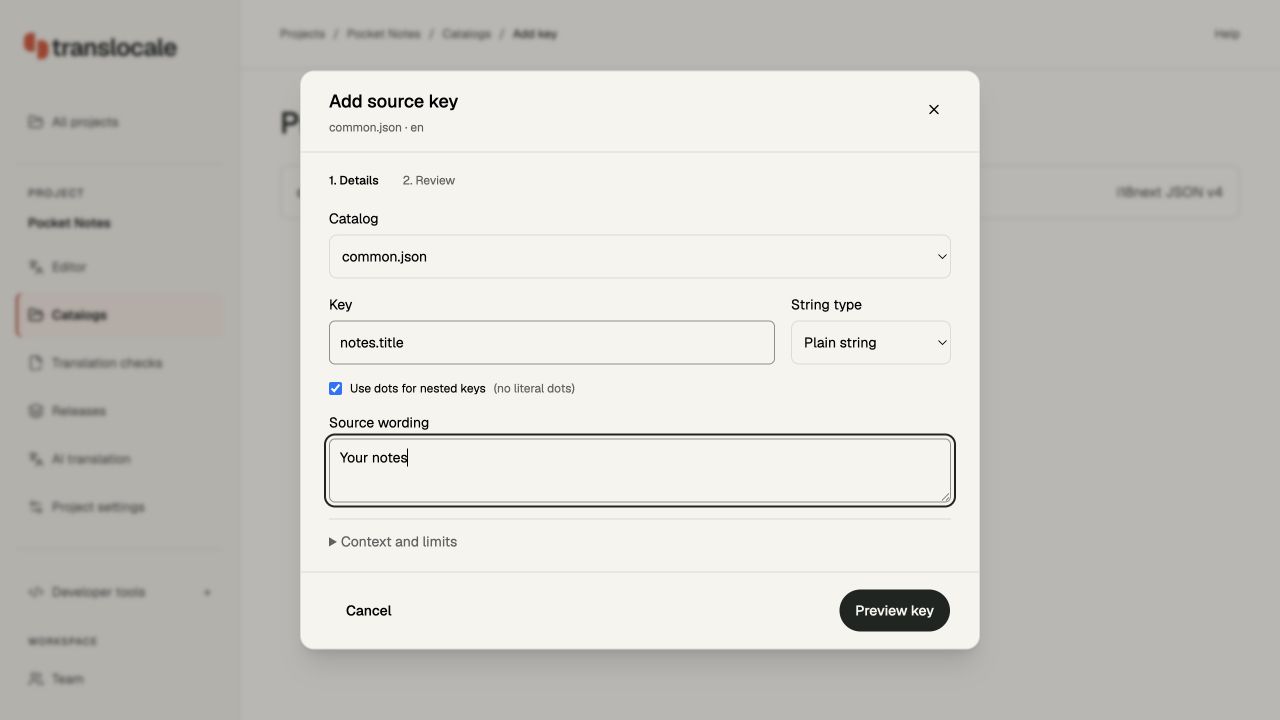
To add a key later, choose Catalogs → Add key. Select the catalog, enter a key and its source wording, inspect the preview, and create it. Then fill in its target translations in the editor. Adding keys changes the app’s catalog contract, so update bundled files and ship a matching app build before relying on them.
3. Review and approve translations
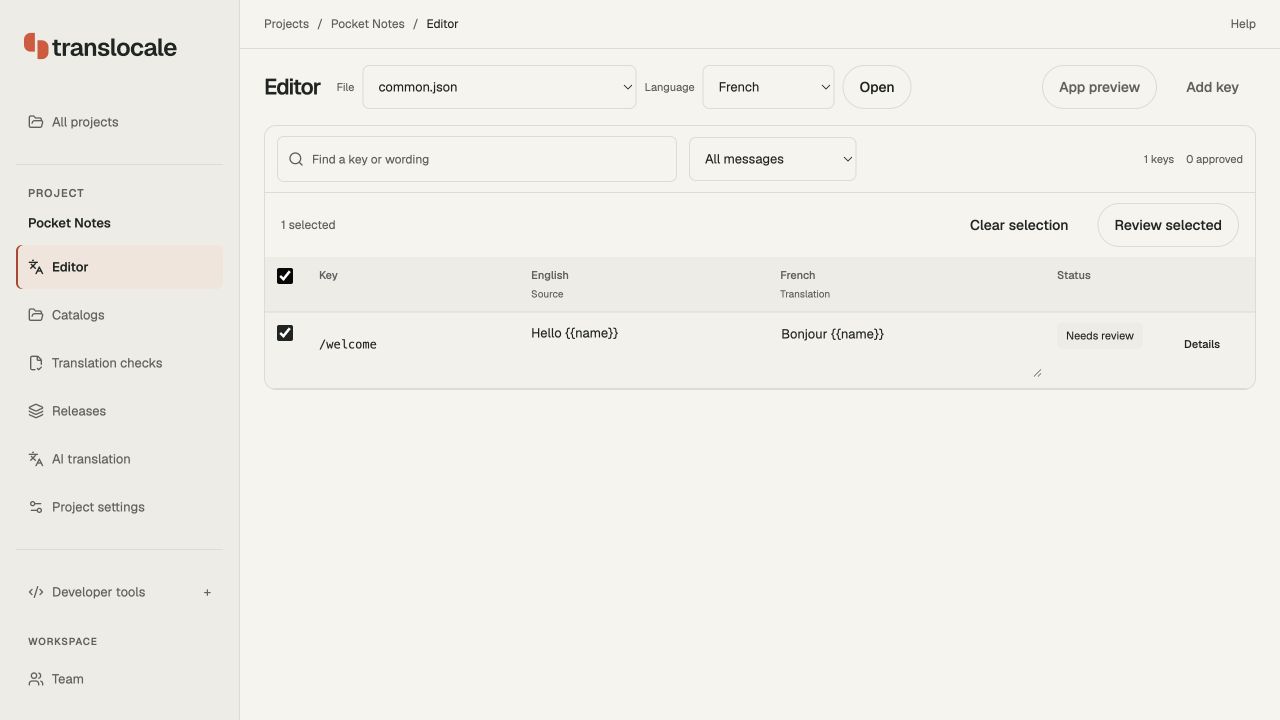
Open the Editor and select French. Review each translated value and preserve placeholders such as {{name}}. You can write translations yourself, import language files, or bring wording from your own AI assistant. Save changes, select the keys, choose Review selected, inspect the saved wording, and choose Approve. A solo owner can approve their own work.
AI translation is optional. That screen previews the character estimate and requires an explicit character limit before a job starts. Importing files, adding keys, editing, and normal app delivery do not start paid translation jobs.
4. Create a release and publish to Preview
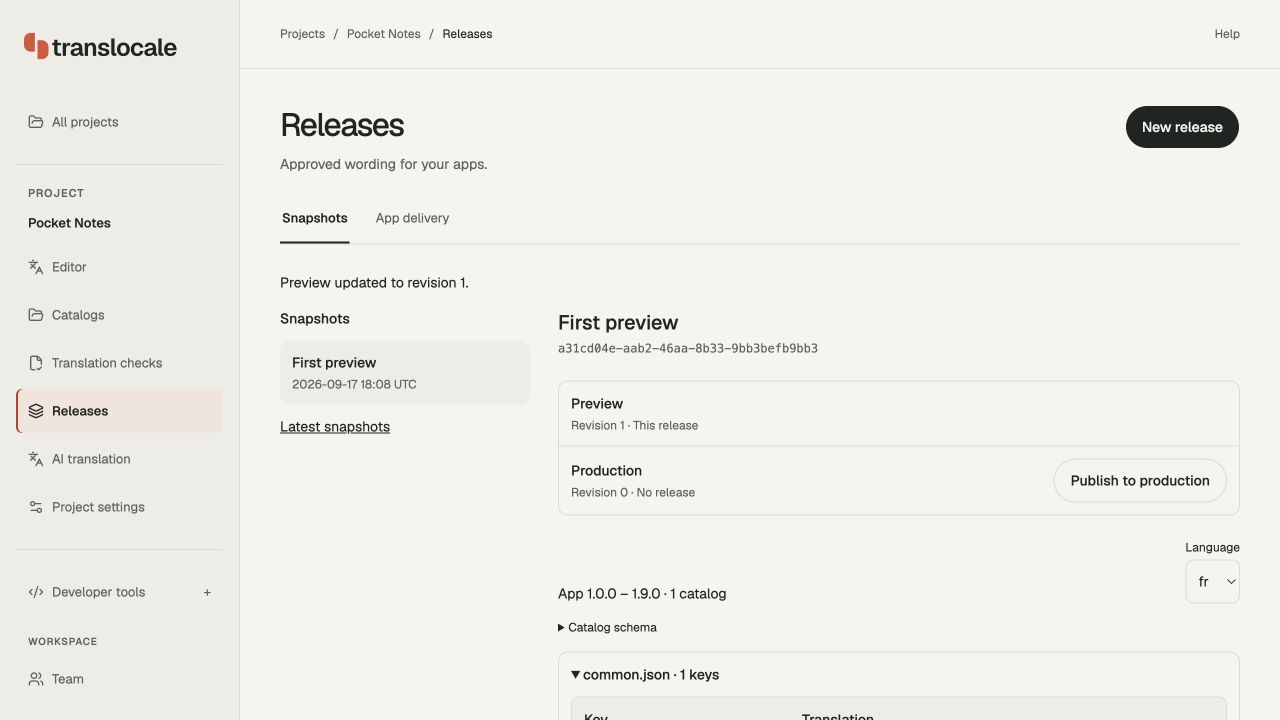
Open Releases → New release. Choose the approved catalogs and target languages, name the release First preview, and set an app-version range that includes your test build, such as 1.0.0 through 1.9.0. Choose Review snapshot, inspect the wording, then choose Create snapshot. A release freezes the approved wording; later editor changes do not alter it.
Select that release, prepare its Preview publication, inspect the proposed change, and confirm it. Preview is for testing the wording in your app. Publishing a channel alone does not confirm that your app received the update.
5. Download your app’s delivery configuration
In Releases, open App delivery. Under New credential, select the release schema you just created, enter a name such as Pocket Notes preview, and choose Preview. Leave the optional expiry empty unless you have a rotation plan. Choose Create credential, then Download configuration. Save the downloaded translocale-delivery.json before choosing Done or leaving the page.
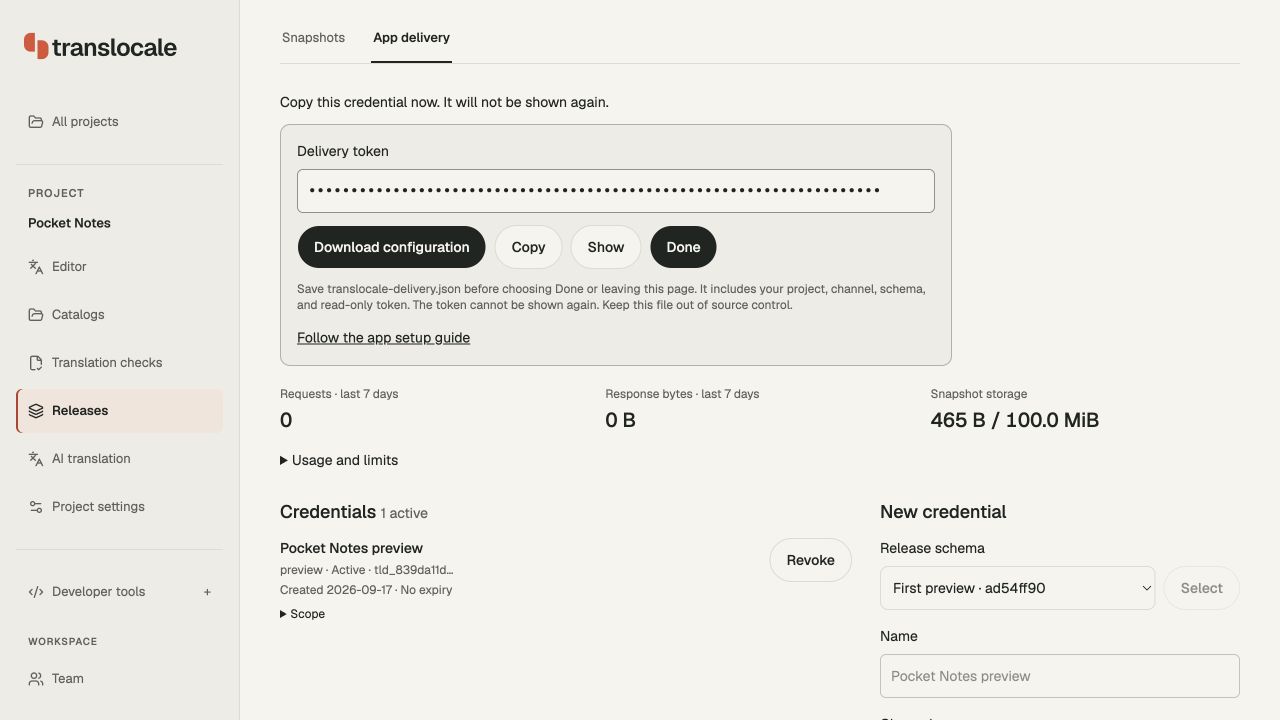
The download contains apiBaseUrl, projectId, channel, schemaHash, and deliveryToken. The schema hash identifies the compatible catalog structure; you do not invent it. The token only reads releases for that project, channel, and schema. Only a workspace owner can create or revoke it. If you lose it, revoke the old credential and create a replacement.
Keep the file out of source control and provide it through your build environment. Delivery credentials can be extracted from an installed app, so their permissions are deliberately read-only. Never substitute a project authoring token. The download does not contain your bundled language files or your app’s namespace mappings; the React Native setup below explains those.
After you see the Preview wording in the app, promote that same release to Production. Create a separate Production delivery credential and download its configuration for the production build. A Preview token cannot read Production; changing only the channel text in the JSON will not grant access.
6. See a wording update without rebuilding
Run the app with French selected. Its bundled greeting is Bonjour {{name}}. In the dashboard, change the French value to Salut {{name}}, save and approve it, then create a new release and publish it to Preview. Keep the same key, placeholder, catalog name, languages, and app-version range.
The next delivery check should show Salut with the supplied name. You can call delivery.check() for an immediate check. Wording-only changes keep the same schema, so reuse the existing Preview credential and app build. Check cached wording after restarting offline, then promote the tested release to Production. Changes to keys, placeholders, or languages need compatibility checks and can require a new build.
When do I need a project token?
The dashboard uses your signed-in session, so this walkthrough does not require a separate project token. Your installed app uses the delivery credential from step 5. The CLI, CI, and API use authoring access, which belongs on your development machine or server.
For local CLI work, use browser sign-in instead of copying a token. Replace PROJECT_UUID with the ID under Project settings → Credentials, run the command below, and approve that project in the browser. The CLI saves the credential outside your app. Read access is enough for inspection; commands that edit or translate require the corresponding permissions.
npx @translocale/cli login --api https://translocale.io --project PROJECT_UUID --scope readFor CI or direct API access, open Project settings → Credentials. Give the credential a name, select only the access it needs and an expiry, then choose Create credential. Copy it while it is shown and store it as TRANSLOCALE_TOKEN in your CI secret store. Do not put it in translocale-delivery.json, source code, or an EXPO_PUBLIC_ variable.
If your first update does not appear
Check that the channel has a published release, the token belongs to that channel, and your app version is inside the release’s range. Local keys, placeholders, languages, catalog names, and namespace mappings must match the selected release. A newly added key or language usually needs a new app build. Existing installed apps keep using their compatible schema.
If a credential is lost, expired, or revoked, issue a replacement and update the build configuration. Delivery failures keep the last valid cached or bundled wording. Use delivery.getState() to inspect the runtime status without printing credentials.
Screenshots use a local demo workspace with sample wording. Tokens stay masked. The dashboard steps match the application; the captures do not demonstrate hosted native delivery.